


What the heck do I do with all this mint?
- carrie mason

- May 21, 2020
- 9 min read

A little garden warfare, an overabundance of mint, and ice cream to die for!

Hello friends, and welcome to Spring! I know the calendar says we have been in spring for several weeks, but here in SE PA, mother nature has been a tease. We had a fantastic February chock full of warm days and the promise of what was surely going to be an early spring.
But then all hell broke loose.
March is a bitter bitch during a normal year, and this is NOT a normal year.
This is 2020.
Ahhh, yes 2020, the year of pandemics, quarantines, viruses, shutdowns, murder hornets and cold snaps that last all the way through March, April and half of May, ending just in time for our first tropical storm! 2020 isn't fucking around.
My garden that was previously weeks ahead is now suddenly weeks behind and that is literally the least of the issues.
Per those handy dandy FB memories, and then corroborated by my Google photo cloud, this time last year I was picking bowls of strawberries daily. My wisteria and rhododendron were putting on their legendary show of shows and the sonofabitchin mint was EVERYWHERE!
But in 2020, my favorite garden blossoms are still weeks away due to the late cold, the strawberries are tiny little green flower buds and even my crazy ass mint is still in baby stages, meaning I only have about 2 bushels worth right about now. Yes, I said 2 bushels, and I am NOT exaggerating.
How did I find myself in this minty hell of overabundance?? Let's go back a bit, to what will be 10 yrs ago this June.
Buhbah and I were bright-eyed new homeowners.


We loved our new home for sooooo many reasons, but, the deck and gardens were two of our big ones.
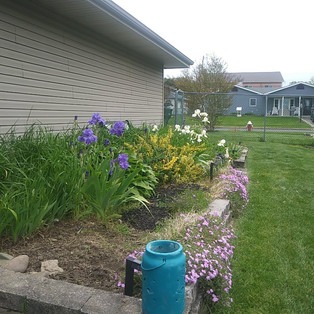
There was a large perennial garden along the side of the house, split in half by a small set of steps, a rocky path, and a garden bench. I clearly remember driving by the house (before we made settlement but after our offer had been accepted) and excitedly exclaiming to the big man "I hope they leave the bench, do you think they will leave it?" He would chuckle, and say we could buy our own bench if they didn't. I knew this would be a spot that I could sit and be happy. A place to think things through, or to read, or get some sun, etc... I certainly did not think it would be a place I would watch a child happily bound through the grass, because at this point, I was still convinced that I didn't want to have a child, like never ever....hahahah, how little I still had to learn.
Well, the bench was left behind, and it did indeed become a place that I would sit and chill and relax (Red calls this Chillaxing, thank you YouTube for turning my babe into a bro).
That beautiful garden was now mine, and well..I knew NOTHING about gardening!! Prior to this, I had tended a wee flower bed at our first apartment, and had a small patch of tomatoes that I grew at my grandfather's house. In all this infinite wisdom, I was sure I could handle a garden of this size, no problem. I got this!
Oh how very wrong I was....
Three weeks after we became "official homeowners", we found ourselves in the manic throes of the June growing season. My beautiful garden was quickly and aggressively overtaken by thistle and crabgrass. I weeded for hours every single weekend, and as soon as I would pull, they would come back. I had no clue how, but they seemed to grow by the foot overnight! I was panicking! Was I going to lose my beautiful garden the first year?!?! There was just no way to keep ahead of the growth of the goddamned crabgrass and thistle from hell.
I was done! It was time for WAR!
Armed with zero knowledge, but somehow sure that I was on to something totally new and never before done, I decided to plant what were known as aggressive plants that would spread and take over.
Everyone always says "Don't plant mint in the ground, it will take over everything and go everywhere" Well, certainly, that was exactly what I wanted, right? If something was going to take over, I would much rather it be something useful, rather than fucking shitty-ass, painful thistle-y thistle, or an annoying crabgrass that put it's crabby roots all throughout my beautiful plants and flowers!
Yes! I was clearly on to something big, something huge, something bigly, something well...disastrous, if I am being totally honest.
So I planted mint and strawberries on one side of my beautiful perennial bed. The mint was to choke out the noxious weeds. The strawberries were because I thought they would be charming, useful, and also fill in the area that was previously mulched (I am not a big fan of mulch and strawberry was to become my ground cover, to protect from soil erosion and moisture loss, just as mulch does...but also be more attractive, as well as useful!) But I didn't just conservatively plant one or two mint plants experimentally. I was so sure of my plan, I doubled down, and planted 6 (!) mint and six strawberries. I was in for a treat for sure, I just knew it.
So, a decade later, and I guess you know by now, my brilliant plan for garden warfare did not only fail, it failed massively. I have mint EVERYWHERE. (and still just six strawberry plants, hah!)
Also, I still have painful thistle (which I swear has grown stronger after fighting off mint for a decade) and crabby crab grass in insane amounts. Both wielding super human strength and despite my now feeble and laughable attempts to remove them, they grow bigger and stronger every year. I will not give up the good fight, I will continue with my manual labor and fierce dedication to eventually find and remove the mother ship thistle plant, which has thus far eluded me.
But that leaves me with the big problem.
What the FUCK do I do with all this mint!?!?!?
I have collected an impressive array of recipes, honed through the last decade and dedicated to one subject and one subject only. Mint.
The best recipes, use a LOT of mint at a time, they are not shy about their minty-ness. These are not "hint-of-mint" dishes, these are gutsy, fresh and full flavored mint-forward recipes that are meant to utilize as much as possible at a time. Our most favorite of these recipes, is of course, mint ice cream!
Mint ice cream is not hard. In fact, it is super simple. But really great Mint ice cream, has been a bit of a challenge.
Mint can get a bit tannic if over steeped. Alternately, it can be too much of a whisper if not steeped enough.
Then there is the issue of color, the natural color varies widely; early in the spring it steeps a lovely faint green but later in the season, it steeps a bit on the tan side, so for this recipe, I use food coloring- it is optional and we try to avoid it in most cases. This batch, being early in the season was a nicely shaded faint green, but for the sake of showing the recipe with the color, we went ahead and used it. This recipe only uses about 2 drops per quart, and it does make it look so vibrant, and there is no mistaking this for Cookies and Cream in the freezer.
Surprisingly, the biggest challenge we ran into while perfecting our "perfectly-perfect-mint-ice-cream, was chocolate.
The only thing I like more than coffee and chocolate, or peanut butter and chocolate, is mint and chocolate!
There is nothing wrong with mint ice cream on it's own, but the chocolate is an excellent counterpoint, and, along with the dairy, it calms the minty-ness of the mint, provides a dark and sweet counterpoint that simply plays well. It also reminds me of eating Junior mints while watching childhood movies in a cool theater on a hot summer day, or that particularly awesome episode of Seinfeld.
I have previously used chocolate chips or chunks (they freeze hard, making it kind of hard on the teeth to eat). We then moved on to shaved chocolate, an idea inspired by the recipe in Sweet Scoops, and while that was nice, I knew we were missing something to get the perfect chocolate mint ice cream experience. One that didn't just use up the mint, but became something special that we would YEARN for, something to bring excitement to the mint days!
Today, while reaching in for something chocolate to make the ice cream, I saw it, the bag of Oreos. Not just any Oreos either. Dark Chocolate Oreos. I have never bought these before, so it seems like there was perhaps some divine intervention at work here. Once crushed and added to the ice cream, I realized I had found it.
The last piece of the puzzle to the perfect chocolate mint ice cream.
The cookies, in larger chunks, stay crisp, but the smaller pieces soften up and melt into the ice cream. The chocolate filling blends into the base, creating pockets of silkyness. This is the epic ice chocolate mint we have needed.
Now, I have no problem when the mint comes in by the bushel!! I can just keep churning out this ice cream, and have one happy 7 yr old, one happy mama, and hell, once this quarantine is lifted, one happy neighborhood!
You can sub chips, chunks, shaved chocolate or leave it out entirely for a simple, fresh mint ice cream. Let me know what you decide to do!
Now let's make some ice cream and get rid of some of this freaking mint!!!!!
Recipe inspired by the Sweet Scoops Recipe "Chocolate Flecked Fresh Mint Ice Cream", the book can be found on Amazon by clicking here. **this is NOT an affiliate link, and I do not receive any funds for purchases, but this is an easy to follow and inexpensive ice cream book for beginners. It has plenty of easy standards, as well as some interesting combinations and techniques.**
Fresh Mint Ice Cream with Cookies and Chocolate Cream
Party Favors:
Heavy saucepan
Ice Cream Maker
Fine mesh sieve
Heatproof mixing bowl
Handmixer (or sturdy large whisk and a strong bicep)
An ice bath: a large bowl filled with ice and a bit of water and salt, and a smaller bowl that will next inside (small bowl must be at least 3 qt)
Guest List:
2 cups (1 pint) light cream
1 3/4 cup whole milk
2 cups lightly packed fresh mint leaves
4 large egg yolks
1/2 cup sugar
2-3 drops green food color (optional)
8 Dark Chocolate Oreo (or original, or (!) mint oreos) crushed
Ice, Ice Baby...
In a heavy saucepan, over medium high heat, warm the cream, milk and mint leaves, stirring frequently until barely simmering (about 5 minutes). Turn off heat and let the pan stay on the burner,uncovered.

Meanwhile, in heat-proof mixing bowl, combine, the egg yolks and sugar, beat on high speed or whisk vigorously until the mixture become lightens and doubles in volume (about 3-4 minutes)


Remove the pan with the cream mixture from the burner and using a ladle, transfer about 1 cup of the hot cream (through a fine mesh sieve) into the bowl of sugar and eggs. Whisk well until fully combined, and then slowly strain the rest of the cream into the bowl, stirring constantly. Discard the mint leaves and then pour the
incorporporated ice cream base back into the sauce pan and place over medium heat.

Using a wooden spoon, stir until the mixture forms a custard, it should be thick enough to coat a wooden spoon (run your finger across the back and it should leave a channel.) about 3-4 minutes (do not allow the custard to come to a boil).
Pour the custard into the inner bowl of the ice bath. (pouring through a mesh sieve again will help further reduce bubbles/air making a more dense ice cream). Using a wooden spoon, stir quickly to cool. Remove the bowl from the ice bath, and add food coloring (if using) stirring gently taking care not to create too many bubbles in the custard.
Cover the custard with plastic wrap, laying the wrap,directly on to the surface of the custard, then using a second piece of wrap, cover again, from edge to edge of the bowl, then place the custard in the fridge to fully cool and chill WELL. Minimum 3-4 hours up to a 3 days.
Party Time!!!


Pour the cold custard mix into an ice cream maker, and churn according to manufacturer's directions. Add the crushed oreos during the last 1 minute of churning. (if you have large pieces, remove the ice cream from the maker and fold in by hand). If you want soft serve consistency, serve immediately***.
***If you prefer hand dipped***
Transfer the ice cream into a freezer safe container with an airtight lid. Cover the ice cream with plastic wrap directly on to the surface of the ice cream, then another layer from edge to edge of the container, then cover with the air tight lid (this will keep the ice cream scoopable directly from the freezer) freeze until firm, at least 2 hrs, or up to 3 days.


Enjoy! Let us know what you think, thanks for playing in the kitchen!

Comments